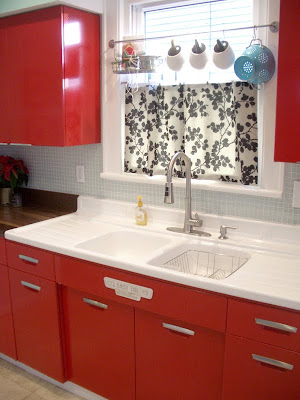
I had a chance to look back through our blog entries today, and it's fun to see how far the house has come since we first bought it. Exactly one year ago, we were getting ready to re-install the then newly-refinished kitchen cabinets. Ironically, it has taken us nearly 11 months to have the counter tops officially installed (that happens tomorrow) - but we have obviously been working on other projects since then.
The tricky thing, we've found, about renovating a home is the "good enough" syndrome that sets in. It seemed much easier in the beginning to take on huge tasks because leaving them unfinished literally meant we had no where to shower or no kitchen to use. Nowadays, putting off a project usually means that a room or piece of furniture is functional even though it may not look exactly how we want it.
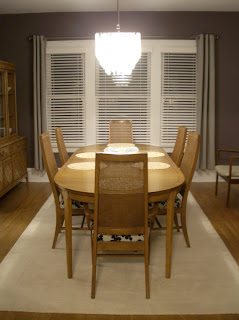
Lucky for us, we're hosting company and another holiday party at the end of this month which means we've got some motivation to tie up those pesky loose end projects. One of those projects was reupholstering our dining room chairs.
Last month, Joann Fabrics had a great 50%-off sale on their entire inventory of fabrics. As usual, we found something on the pricier side and that needed to be custom ordered. So we took our measurements, placed the order, bought some new 2" foam, and waited for our shipment to arrive.
This past weekend, we picked up the order and got to work. Below are some progress shots of the process:
 Chair with the old 1980's pastel print and piping.
 Old foam and wooden seat beneath the fabric.
 All of the cushions stacked up together.
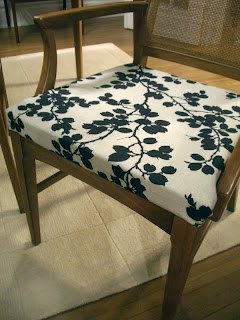
 New "leaf" based fabric to soften up the room.
 View of the entire pattern.
 Laying the seat atop the foam upside-down.
 Tracing the shape of the seat onto the foam with a permanent marker.
 Making sure everything is aligned and oriented correctly.
 Electric carving knife from Blair's dad. These things work incredibly well; we highly recommend using one if you plan on cutting your own foam.
 The final seat cushion, trimmed to size.
After looking through our photos, we realized we didn't take any progress pictures of us wrapping the seats with the fabric. We did them ourselves (I promise!), but it was a two-person job and there wasn't anyone else to document while we worked. In case you are interest or want to reupholster your own chairs, here's a link to the video we used that showed us how to complete the project (thanks ReadyMade!).
Photos of the finished chairs will be included in the final dining room reveal (to be posted tomorrow!)...


 More photos will be uploaded tomorrow of the fully decorated tree and the grouted tile.


 Chair with the old 1980's pastel print and piping.
 Old foam and wooden seat beneath the fabric.
 All of the cushions stacked up together.
 New "leaf" based fabric to soften up the room.
 View of the entire pattern.
 Laying the seat atop the foam upside-down.
 Tracing the shape of the seat onto the foam with a permanent marker.
 Making sure everything is aligned and oriented correctly.
 Electric carving knife from Blair's dad. These things work incredibly well; we highly recommend using one if you plan on cutting your own foam.
 The final seat cushion, trimmed to size.


