Here are the latest pics! Enjoy.
____________________________________________________________________
Floors....a 500 step process!

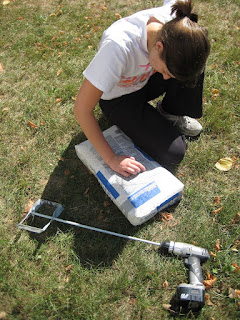
Reading the instructions on the "self-leveling" concrete we had to use on the kitchen floor - very important!

The reason we had to level the floors! When the addition was added to the kitchen, there was some settling that made the floor dip down.
 Matt pouring the self-leveler - it looked so much like runny chocolate frosting it was hard to see Matt put it on the floor!

More self-leveling going on....
 The subfloor that took 7 hours to do! Matt and his dad worked until 1am and then Matt finished it up at 3am! I owe him something for this...any suggestions?
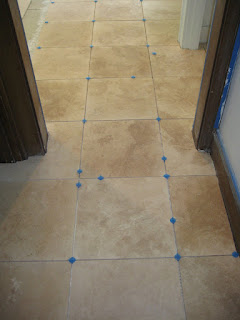
 TILE!!! The entrance to the kitchen.

Matt laying the last travertine tile! Matt had some help with the floors. A guy that his mom knew worked with him. While they finished the floors, I worked in the hallway, which is now ready to prime and paint!
 Matt pouring the self-leveler - it looked so much like runny chocolate frosting it was hard to see Matt put it on the floor!
More self-leveling going on....
 The subfloor that took 7 hours to do! Matt and his dad worked until 1am and then Matt finished it up at 3am! I owe him something for this...any suggestions?
 TILE!!! The entrance to the kitchen.
Matt laying the last travertine tile! Matt had some help with the floors. A guy that his mom knew worked with him. While they finished the floors, I worked in the hallway, which is now ready to prime and paint!
Items left to do before I can chop...
1.) Grout and seal tile floors
2.) Get the old sink refinished
3.) Paint the cabinets
4.) Install cabinets and appliances
5.) Buy a fridge on Craiglist
6.) Order countertops
1.) Grout and seal tile floors
2.) Get the old sink refinished
3.) Paint the cabinets
4.) Install cabinets and appliances
5.) Buy a fridge on Craiglist
6.) Order countertops


1 comment:
Love the floors! Great job guys!
Post a Comment